提前准备
新建demo6
wxml:
<view class= "out">
  <view class="row" wx:for="{{3}}">
    <view class="pic">
      <image src="/images/home.png" mode="widthFix"></image>
    </view>
    <view class="text">
        <view class="title">这里填标题</view>
        <view class="time">2020-05-01</view>
    </view>
  </view>
</view>
wxss:
.out{
  padding: 30rpx;
  box-sizing: border-box;
}
.row{
  display: flex;
  margin-bottom: 20rpx;
}
.pic{
  flex:2
}
.pic image{
  width: 100%;
}

.text{
  flex:8;
  border-bottom:1px solid rgb(50, 52, 49);
  padding-left:10rpx;
  display: flex;
  flex-direction: column;  /* 内部的容器布局将垂直显示,正如一个列一样。 */
  justify-content: space-between;  /* 项目位于各行之间留有空白的容器内,形成标题在上,日期在下的布局  */
}

.text .title{
  font-size:38rpx;
}

.text .time{
  color: #999;
}

这样只需要将请求数据放在模板内,就能达到展现动态数据的效果。
模拟数据请求
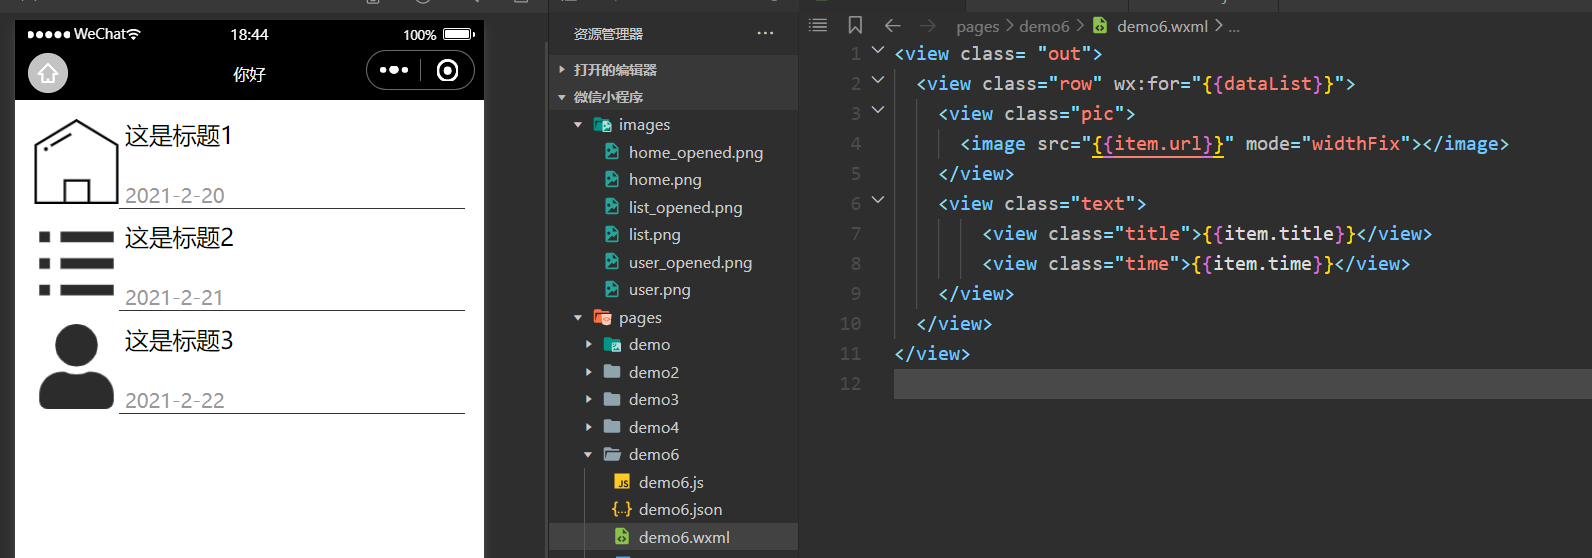
假设js中的data是由后端传输过来,这时需要将数据嵌套进模板中,之后渲染成页面返回给用户。
这步模拟数据请求,主要研究页面如何呈现传输过来的数据。
wxml:
<view class= "out">
  <view class="row" wx:for="{{dataList}}">
    <view class="pic">
      <image src="{{item.url}}" mode="widthFix"></image>
    </view>
    <view class="text">
        <view class="title">{{item.title}}</view>
        <view class="time">{{item.time}}</view>
    </view>
  </view>
</view>
js:
/**
   * 页面的初始数据
   */
  data: {
    dataList:[
      {title:"这是标题1",
      time:"2021-2-20",
      url:"/images/home.png"
    },
      {title:"这是标题2",
      time:"2021-2-21",
      url:"/images/list.png"
    },
      {title:"这是标题3",
      time:"2021-2-22",
      url:"/images/user.png"
    }
    ]
  },
接着访问页面:

request数据请求
https://developers.weixin.qq.com/miniprogram/dev/api/network/request/wx.request.html
小程序的数据请求一般分为两种:
- 加载页面时自动进行数据请求
- 点击按钮进行数据请求
| 属性 | 类型 | 默认值 | 必填 | 说明 |
|---|---|---|---|---|
| url | string | 是 | 开发者服务器接口地址 | |
| data | string/object/ArrayBuffer | 否 | 请求的参数 | |
| header | Object | 否 | 设置请求的 header,header 中不能设置 Referer。content-type 默认为 application/json | |
| timeout | number | 否 | 超时时间,单位为毫秒 | |
| method | string | GET | 否 | HTTP 请求方法 |
| dataType | string | json | 否 | 返回的数据格式 |
| responseType | string | text | 否 | 响应的数据类型 |
| enableHttp2 | boolean | false | 否 | 开启 http2 |
| enableQuic | boolean | false | 否 | 开启 quic |
| enableCache | boolean | false | 否 | 开启 cache |
| success | function | 否 | 接口调用成功的回调函数 | |
| fail | function | 否 | 接口调用失败的回调函数 | |
| complete | function | 否 | 接口调用结束的回调函数(调用成功、失败都会执行) |
自动进行请求数据
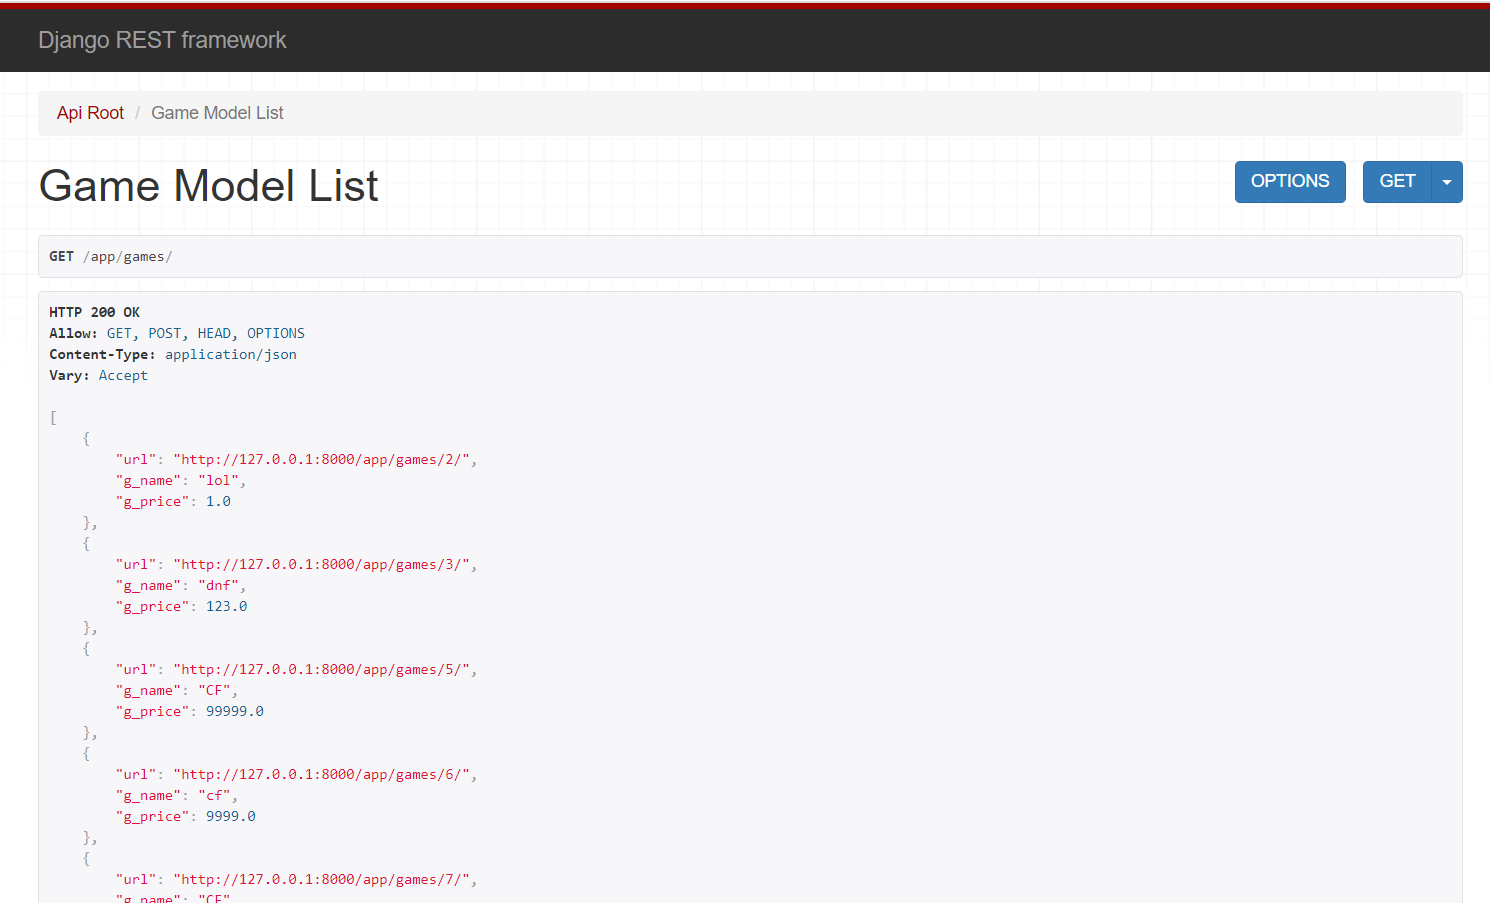
这里需要提供一个后端数据接口,这里使用的是django的restframework提供测试接口数据。

并且微信小程序对接口的域名有安全要求,测试的时候可以点击详情,勾选下图中箭头所指的选项。

在生命周期中的onLoad中:
接受后端的接口数据,然后打印在调试栏:
  /**
   * 生命周期函数--监听页面加载
   */
  onLoad: function (options) {
    wx.request({
      url: 'http://127.0.0.1:8000/app/games/',  /*请求地址*/
      data:{},
      success:res=>{
        console.log(res)
      }
    })
  },
调试栏打印内容:
{data: Array(6), header: {…}, statusCode: 200, cookies: Array(0), errMsg: "request:ok"}
cookies: []
data: Array(6)
0: {url: "http://127.0.0.1:8000/app/games/2/", g_name: "lol", g_price: 1, g_url: "http://qiniu.justinwuwei.cn/u=605429972,1351316434&fm=26&gp=0.jpg"}
1: {url: "http://127.0.0.1:8000/app/games/3/", g_name: "dnf", g_price: 123, g_url: "http://qiniu.justinwuwei.cn/u=605429972,1351316434&fm=26&gp=0.jpg"}
2: {url: "http://127.0.0.1:8000/app/games/5/", g_name: "CF", g_price: 99999, g_url: "http://qiniu.justinwuwei.cn/u=605429972,1351316434&fm=26&gp=0.jpg"}
3: {url: "http://127.0.0.1:8000/app/games/6/", g_name: "cf", g_price: 9999, g_url: "http://qiniu.justinwuwei.cn/u=605429972,1351316434&fm=26&gp=0.jpg"}
4: {url: "http://127.0.0.1:8000/app/games/7/", g_name: "CF", g_price: 99999, g_url: "http://qiniu.justinwuwei.cn/u=605429972,1351316434&fm=26&gp=0.jpg"}
5: {url: "http://127.0.0.1:8000/app/games/8/", g_name: "CSGO", g_price: 122, g_url: "http://qiniu.justinwuwei.cn/u=6054
length: 6
nv_length: (...)
__proto__: Array(0)
errMsg: "request:ok"
header: {Date: "Tue, 23 Feb 2021 10:59:59 GMT", Server: "WSGIServer/0.2 CPython/3.7.5", Content-Type: "application/json", Vary: "Accept, Cookie", Allow: "GET, POST, HEAD, OPTIONS", …}
statusCode: 200
__proto__: Object
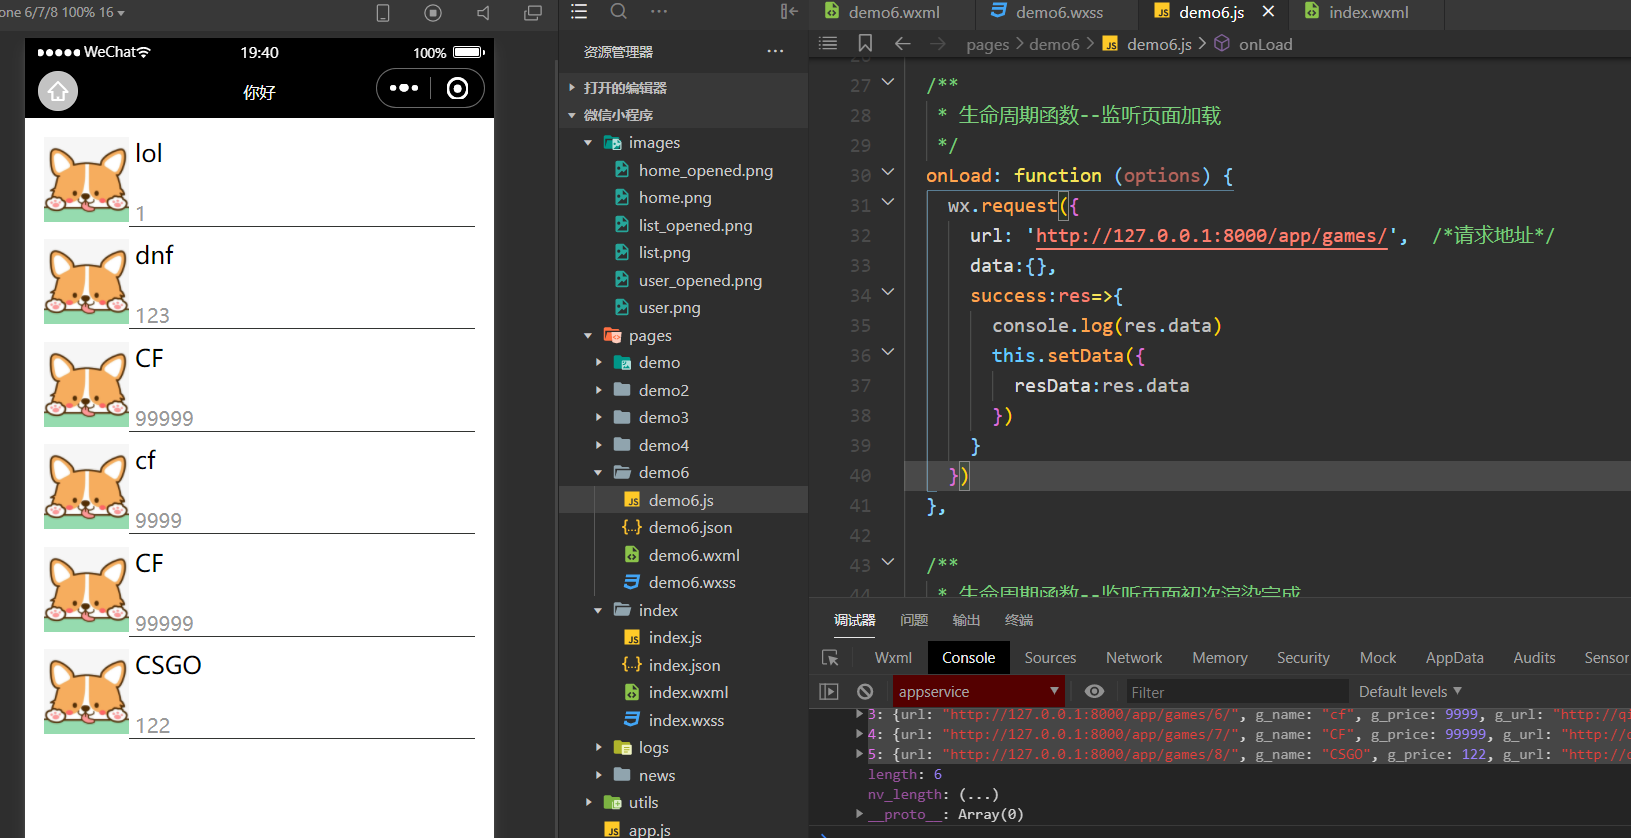
这样从res.data中,就能获取真实数据了。
接下来将page中的data中的datalist改成从后端获取的真实数据
wxml:
<view class= "out">
  <view class="row" wx:for="{{resData}}"  wx:key="index">
    <view class="pic">
      <image src="{{item.g_url}}" mode="widthFix"></image>
    </view>
    <view class="text">
        <view class="title">{{item.g_name}}</view>
        <view class="time">{{item.g_price}}</view>
    </view>
  </view>
</view>
js:
  data: {
    dataList:[
      {g_name:"这是标题1",
      g_price:"2021-2-20",
      url:"/images/home.png"
    },
      {g_name:"这是标题2",
      g_price:"2021-2-21",
      url:"/images/list.png"
    },
      {g_name:"这是标题3",
      g_price:"2021-2-22",
      url:"/images/user.png"
    }
    ],
    resData:[
      {url:"/images/user.png"}
    ]
  },

  /**
   * 生命周期函数--监听页面加载
   */
  onLoad: function (options) {
    wx.request({
      url: 'http://127.0.0.1:8000/app/games/',  /*请求地址*/
      data:{},
      success:res=>{
        console.log(res.data)
        this.setData({
          resData:res.data
        })
      }
    })
  },

成功调用接口,呈现到小程序中。
携带参数请求数据
刚刚一次性将数据库中6条数据全部展现出来了,如果每次请求,只需要固定的数据量,可以在request中的data携带发给的后端的参数,这样后端接收到参数之后就能返回响应的数据。

此处评论已关闭